Integrating IF573 on NUCLEO-H745ZI-Q via Ezurio STM32 Nucleo Adapter Card Introduction The STM32 Nucleo Adapter Card is designed for effortless integration with the Nucleo-144 form factor board. Featuring 144 pin headers, it connects seamlessly to the STM32 Nucleo board without the need for any hardware modifications. Furthermore, it includes a MikroBUS interface that facilitates peripheral expansion. This guide outlines the process for configuring the setup on STM32CubeIDE and executing Wi-Fi functionality on the NUCLEO-H745ZI-Q using FreeRTOS. The tutorial specifically focuses on the example related to IF573. Hardware Setup In the images provided, you can observe the NUCLEO-H745ZI-Q with a Nucleo-144 adapter on the left, alongside the STM32 Nucleo Adapter Card with the IF573 positioned on top of it on the right. 453-00119 (IF573, M2, SDIO) is plugged into M.2 slot. Note: Ensure that the power source is configured to +5V, as indicated in red above. Prerequisites The following software needs to be installed: STM32CubeMX: For generating code by integrating firmware and packages. STM32CubeIDE: IDE for compiling, flashing, and debugging via ST-Link. STM32CubeProgrammer: For flashing binary files onto STM32 boards. Updating Software STM32CubeMX: Installing Updates Launch STM32CubeMX: Navigate to Help > Check for Updates. Refresh the list, select the new version, and click Install. Install STM32 Connectivity Expansion Pack v1.7.1 Open STM32CubeMX and select Install/Remove under Manage Software Installation. Click the Infineon tab, refresh, select version 1.7.1, and click Install. Close STM32CubeMX. Configuring application with STM32CubeMX Open project in STM32CubeMX Copy wifi_bt_tester from the repository: C:\Users\%USERNAME%\STM32Cube\Repository\Packs\Infineon\AIROC-Wi-Fi-Bluetooth-STM32\1.7.0\Projects\NUCLEO-H745ZI-Q\Applications to your personal directory: C:\Users\%USERNAME%\STM32Cube\Examples Rename <application>\STM32CubeIDE to <application>\STM32CubeIDE.org. Double-click wifi_bt_tester.ioc to open in STM32CubeMX. Select Migrate if prompted. Under Pinout & Configuration, select Software Packs > Select Components. Configuration Disable Bluetooth components (btstack, btstack-integration). Choose CYW55572 as the device and SONA-IF573 as the module. Come back to Pinout page. Under FREERTOS_M7 > Advanced settings, enable USE_NEWLIB_REENTRANT. Generate Code Click Generate Code and open the project. Restore Original Linker Script Once project is open in STM32CubeIDE, copy linker script from: ...\STM32CubeIDE.org\CM7\STM32XXXX_FLASH.ld to: ...\STM32CubeIDE\CM7\STM32XXXX_FLASH.ld Building Application in STM32CubeIDE Modify source codes Delete bt_cfg.c and bt_utility from: wifi_bt_tester_CM7 > Middlewares > Connectivity > Wireless > MfgTools > command-console Modify console_task.c located at Application > User > Core: Insert (Private macro section): #define SDMMC1_D0 PC8 #define SDMMC1_D1 PC9 #define SDMMC1_D2 PC10 #define SDMMC1_D3 PC11 Comment out: //bt_utility_init(); Add GPIO initialization code before the stm32_cypal_wifi_sdio_init() function: cyhal_gpio_init(SDMMC1_D0, CYHAL_GPIO_DIR_OUTPUT,CYHAL_GPIO_DRIVE_PULLUP, false); cyhal_gpio_init(SDMMC1_D1, CYHAL_GPIO_DIR_OUTPUT,CYHAL_GPIO_DRIVE_PULLUP, false); cyhal_gpio_init(SDMMC1_D2, CYHAL_GPIO_DIR_OUTPUT,CYHAL_GPIO_DRIVE_PULLUP, false); cyhal_gpio_init(SDMMC1_D3, CYHAL_GPIO_DIR_OUTPUT,CYHAL_GPIO_DRIVE_PULLUP, false); cyhal_system_delay_ms(10); cyhal_gpio_write(SDMMC1_D0, true); cyhal_gpio_write(SDMMC1_D1, true); cyhal_gpio_write(SDMMC1_D2, true); cyhal_gpio_write(SDMMC1_D3, true); cyhal_system_delay_ms(10); cyhal_gpio_free(SDMMC1_D0); cyhal_gpio_free(SDMMC1_D1); cyhal_gpio_free(SDMMC1_D2); cyhal_gpio_free(SDMMC1_D3); Add Build Macro Right-click wifi_bt_tester_CM7, select Properties. In C/C++ Build > Settings > MCU Settings, enable Use float. Under C/C++ Build > MCU GCC Compiler > Preprocessor, add macro BLHS_SUPPORT. Then apply and close. Right-click on wifi_bt_tester_CM7 and select Convert to C. Build Application Build application (Project > Build All). 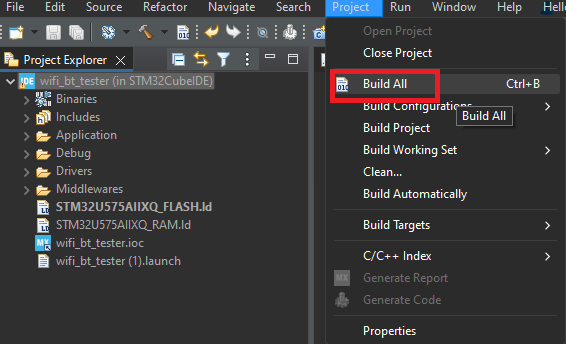 Flash Application Right-click wifi_bt_tester_CM7, select Run As > STM32 C/C++ Application. In Edit Configuration, confirm Debug/wifi_bt_tester.elf is selected, and click OK. Running Application Configure serial port and new-line receive to AUTO. Power cycle the board; Wi-Fi module initializes. Type help to list all available commands. For example, scan command scans for Wi-Fi network.